How To Start A Worm Box And Make Your Own Worm Compost
Introduction
Worm composting, also known as vermicomposting, is a great way to reduce your food waste and create a nutrient-rich fertilizer for your garden. Worms are voracious eaters, and they can convert food scraps into valuable compost in a matter of weeks.
If you're interested in starting your own worm bin, this blog post will walk you through the steps involved. We'll cover everything from choosing the right bin to feeding and caring for your worms.
What is Worm Composting?
Worm composting is a natural process that uses worms to break down organic matter. The worms eat the food scraps, and their waste products are a rich source of nutrients for plants.
Worm compost is often called "black gold" because of its high nutrient content. It's a great way to improve the quality of your soil and boost plant growth.
Benefits of Worm Composting
There are many benefits to worm composting, including:
- Reduces food waste: Worms can eat a variety of food scraps, including fruits, vegetables, coffee grounds, and eggshells. This helps to reduce the amount of food waste that goes to landfills.
- Creates nutrient-rich compost: Worm compost is a rich source of nitrogen, phosphorus, and potassium, which are essential nutrients for plant growth.
- Improves soil quality: Worm compost can help to improve the structure and drainage of soil. It can also help to increase the amount of organic matter in the soil, which can improve water retention and nutrient availability.
- Is easy to do: Worm composting is a relatively easy process that can be done at home. There are many different types of worm bins available, so you can find one that fits your needs and budget.
How to Start a Worm Bin
Here are the steps involved in starting a worm bin:
- Choose a worm bin. There are many different types of worm bins available, so you can find one that fits your needs and budget. Some popular options include plastic bins, wooden bins, and even cardboard boxes.
- Get some worms. You can buy worms from a local nursery or online. Red wigglers are the most common type of worm used for composting.
- Prepare the bedding. The bedding is the material that the worms will live in. You can use a variety of materials, such as shredded newspaper, cardboard, or coconut coir.
- Add the worms to the bin. Once you have the bin and bedding ready, you can add the worms. Be sure to add a small amount of food at first, and gradually increase the amount over time.
- Feed the worms. Worms eat a variety of food scraps, including fruits, vegetables, coffee grounds, and eggshells. Be sure to avoid feeding them meat, dairy, or citrus fruits.
- Water the bin. The bedding should be kept moist, but not wet. You can water the bin with a spray bottle or a watering can.
- Monitor the bin. Check the bin regularly to make sure the worms are healthy and the bedding is moist. If the bedding is too wet, add some more dry bedding. If the bedding is too dry, add some more water.
Conclusion
Worm composting is a great way to reduce food waste, create nutrient-rich compost, and improve soil quality. If you're interested in starting your own worm bin, this blog post has provided you with all the information you need to get started.
Are you interested in learning more about worm boxes? Visit Home Gardening for more information on how to start a worm box, what to feed your worms, and how to use worm castings as fertilizer.
FAQ of worm box
- What is a worm box?
A worm box is a small, self-contained composting system that uses worms to break down food scraps and other organic materials. Worm boxes are a great way to reduce food waste, create nutrient-rich compost, and attract beneficial insects to your garden.
- What are the benefits of using a worm box?
There are many benefits to using a worm box, including:
* Reducing food waste: Worm boxes can help you reduce your food waste by up to 75%.
* Creating nutrient-rich compost: The compost produced by worms is a valuable soil amendment that can improve the fertility of your garden.
* Attracting beneficial insects: Worms attract beneficial insects, such as ladybugs and lacewings, which help to control pests in your garden.
* Being a fun and educational project: Worm boxes are a fun and educational project for children and adults alike.
- How do I start a worm box?
There are a few things you need to do to start a worm box:
* Choose a bin: You can buy a worm bin or make your own.
* Prepare the bedding: The bedding in your worm bin should be moist and aerated. You can use a variety of materials, such as shredded newspaper, cardboard, or coconut coir.
* Add the worms: You can buy worms from a local nursery or online.
* Feed the worms: Worms eat a variety of food scraps, such as fruits, vegetables, coffee grounds, and tea leaves.
* Maintain the bin: You will need to add bedding and food scraps to the bin, and remove the castings (worm poop) on a regular basis.
- What are some common problems with worm boxes?
Some common problems with worm boxes include:
* Overfeeding: If you feed your worms too much, the bin will become too wet and the worms will die.
* Underfeeding: If you don't feed your worms enough, they will not have enough food to survive.
* Moisture: The bedding in your worm bin should be moist, but not wet. If the bedding is too wet, the worms will drown.
* Temperature: The ideal temperature for worms is between 55 and 75 degrees Fahrenheit. If the temperature is too hot or too cold, the worms will not be able to survive.
- How do I troubleshoot problems with my worm box?
If you are having problems with your worm box, there are a few things you can do to troubleshoot the problem:
* Check the moisture level: The bedding in your worm bin should be moist, but not wet. If the bedding is too wet, add some dry bedding. If the bedding is too dry, add some water.
* Check the temperature: The ideal temperature for worms is between 55 and 75 degrees Fahrenheit. If the temperature is too hot or too cold, move the bin to a different location.
* Check the food: Make sure you are feeding your worms the right type of food. Worms eat a variety of food scraps, but they should not eat meat, dairy, or citrus fruits.
Image of worm box
- A worm bin made from a plastic bin. This is a simple and easy-to-make worm bin that can be made from a plastic bin.
- A worm bin made from a wooden pallet. This is a more durable worm bin that can be made from a wooden pallet.

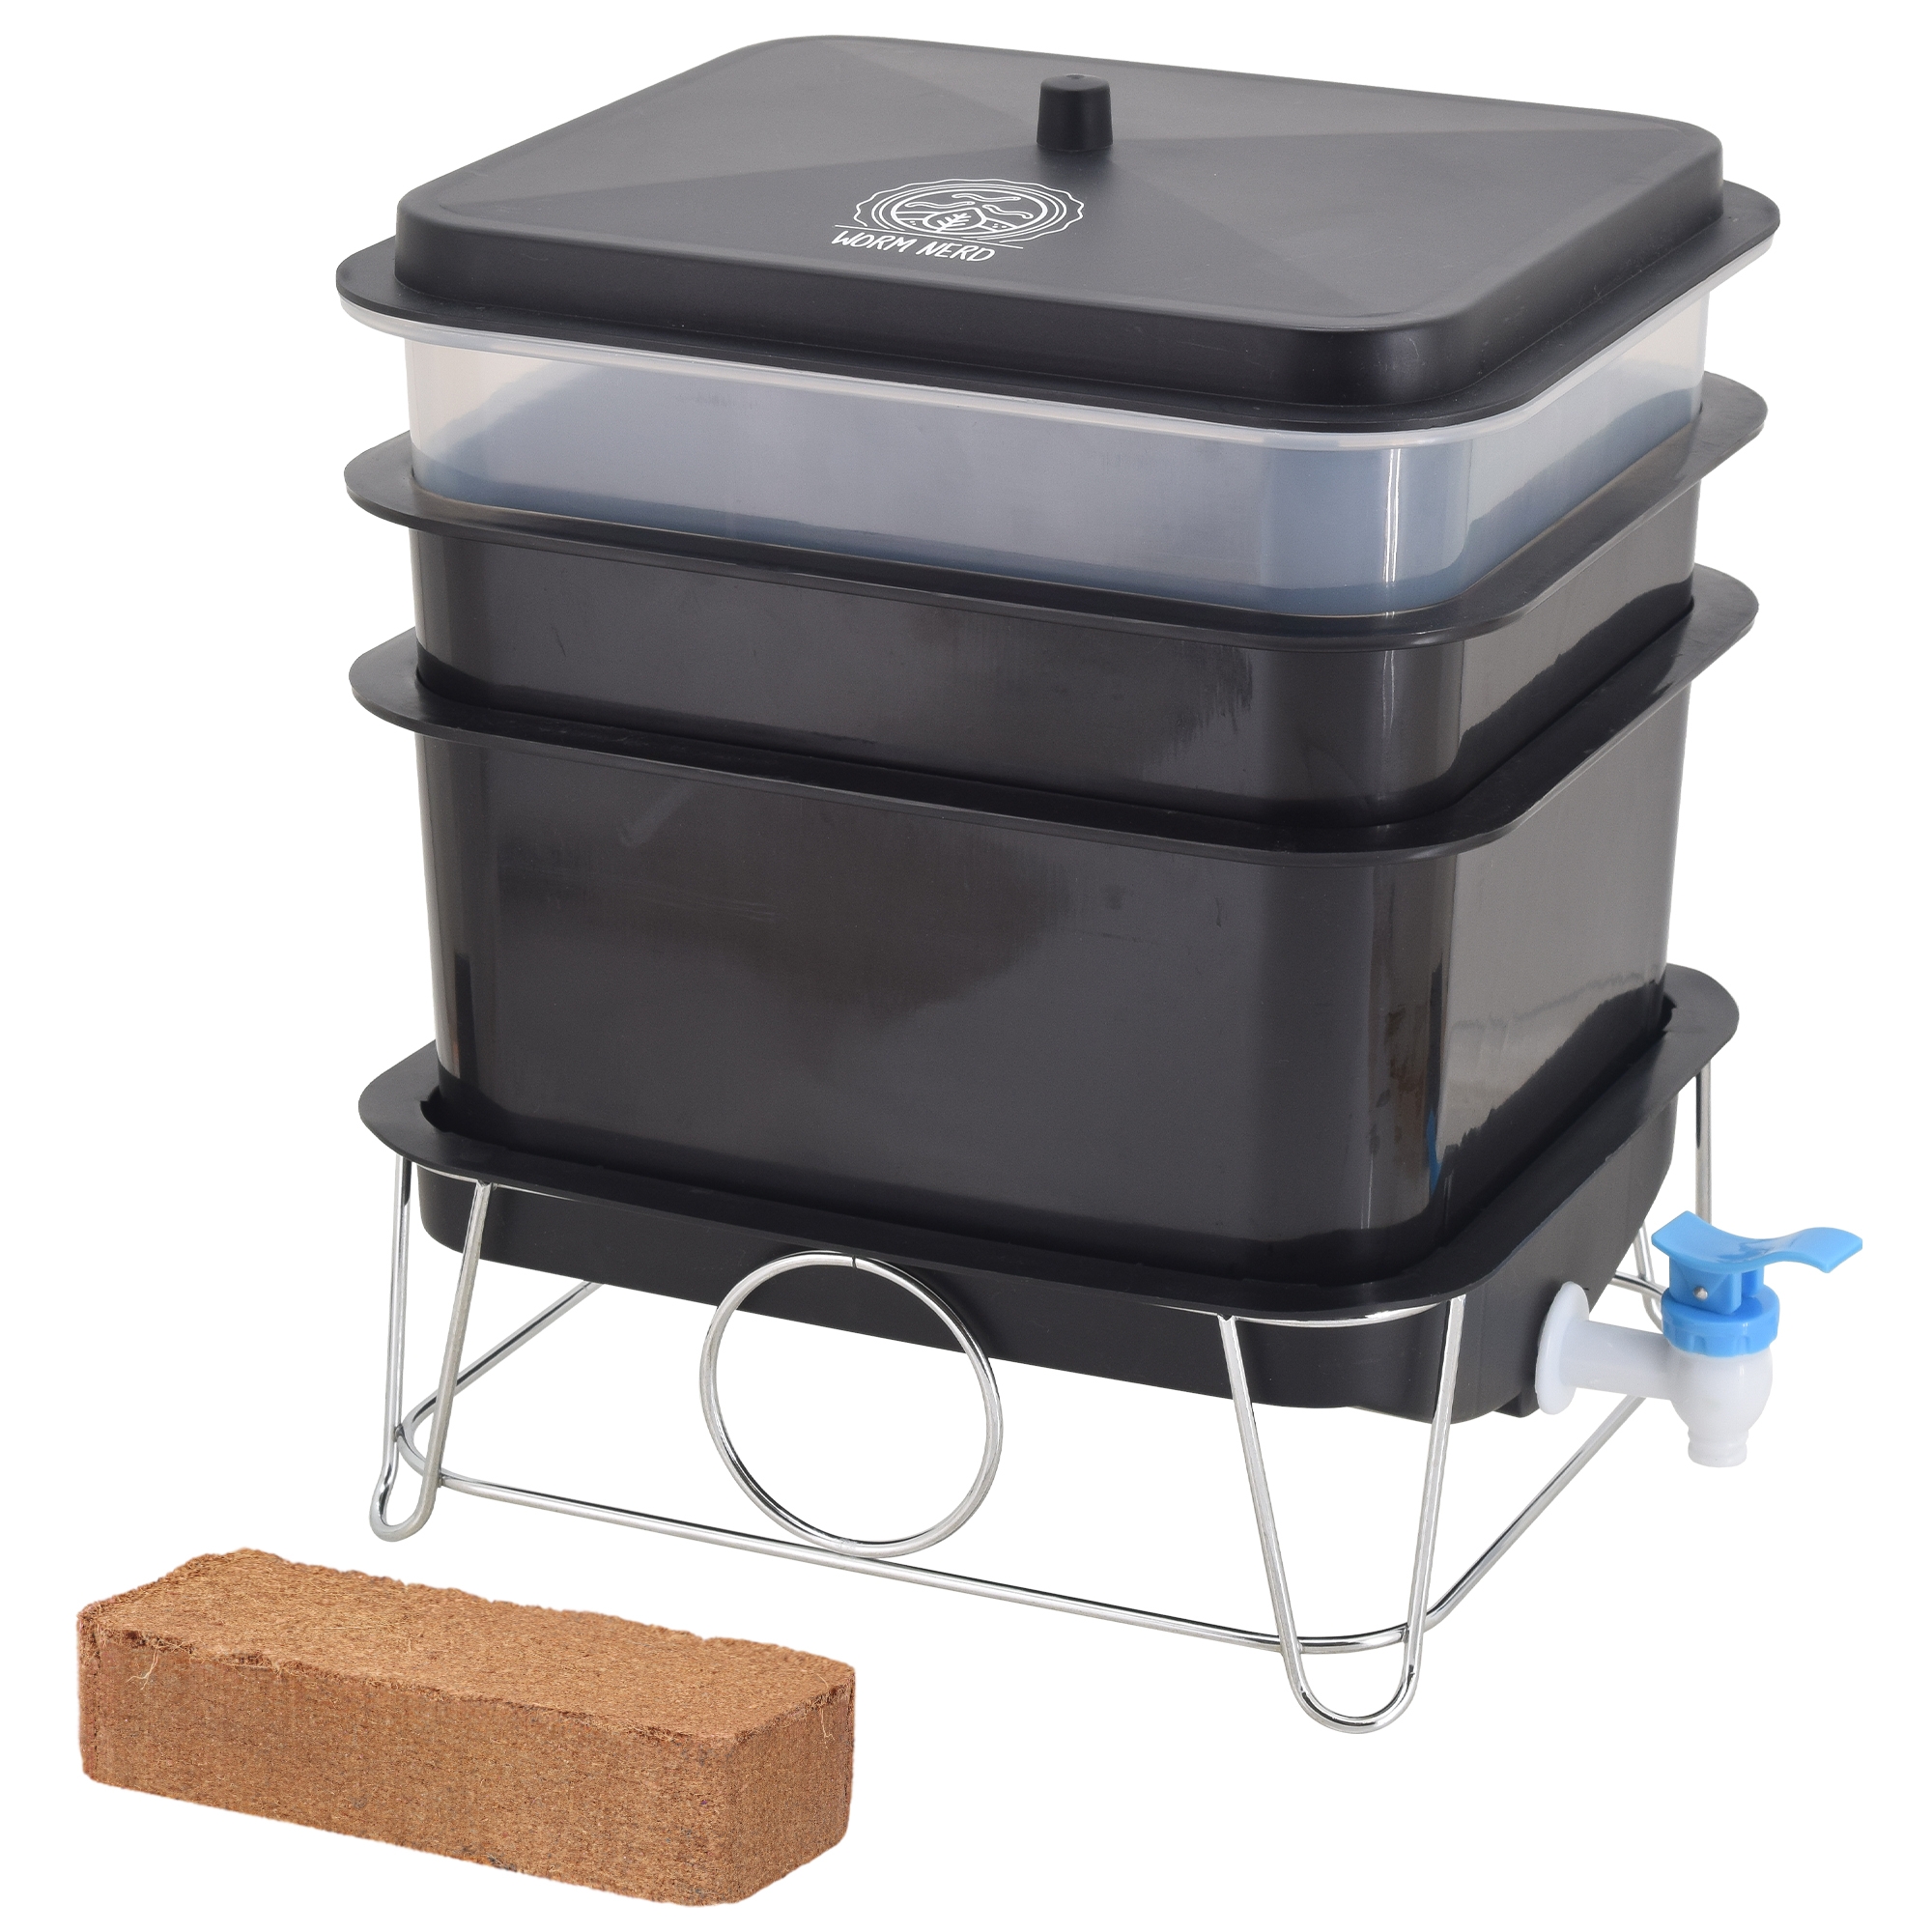
- A worm bin made from a worm farm kit. This is a convenient way to start a worm bin, as it comes with everything you need.
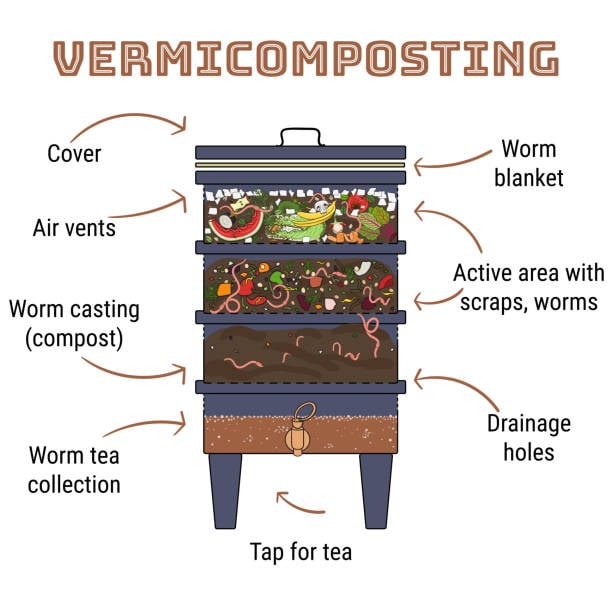
- A worm bin with a clear lid. This allows you to see the worms and the composting process.
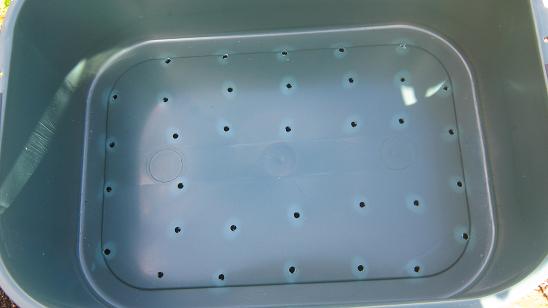
- A worm bin with aeration holes. These holes allow air to circulate in the bin, which is important for the health of the worms.
- A worm bin with drainage holes. These holes allow excess moisture to drain out of the bin, which prevents the worms from drowning.
- A worm bin with a feeding tray. This tray allows you to add food scraps to the bin without having to reach in and disturb the worms.

- A worm bin with a water reservoir. This reservoir provides the worms with water, which is essential for their survival.
- A worm bin with a worm farm tower. This tower allows you to stack multiple bins on top of each other, which saves space.


Post a Comment for "How To Start A Worm Box And Make Your Own Worm Compost"